This Stack and Whack Tutorial for Beginners will cover some of the basics for selecting which pattern you want to make and which fabric will work best for that pattern. The Stack & Whack method involves taking rectangular pieces of fabric that have nearly identical motif prints to make the Stack then Whack (cutting) pieces from this Stack and arranging them to create a kaleidoscope effect.
Selecting the Main Fabric
The main fabric is used to create all your kaleidoscope blocks. Medium to large scale prints create blocks with more interest. Larger pattern repeats create more variety in your blocks which makes your finished product more interesting. Small scale prints are less interesting in large blocks but can be very effective in smaller blocks.
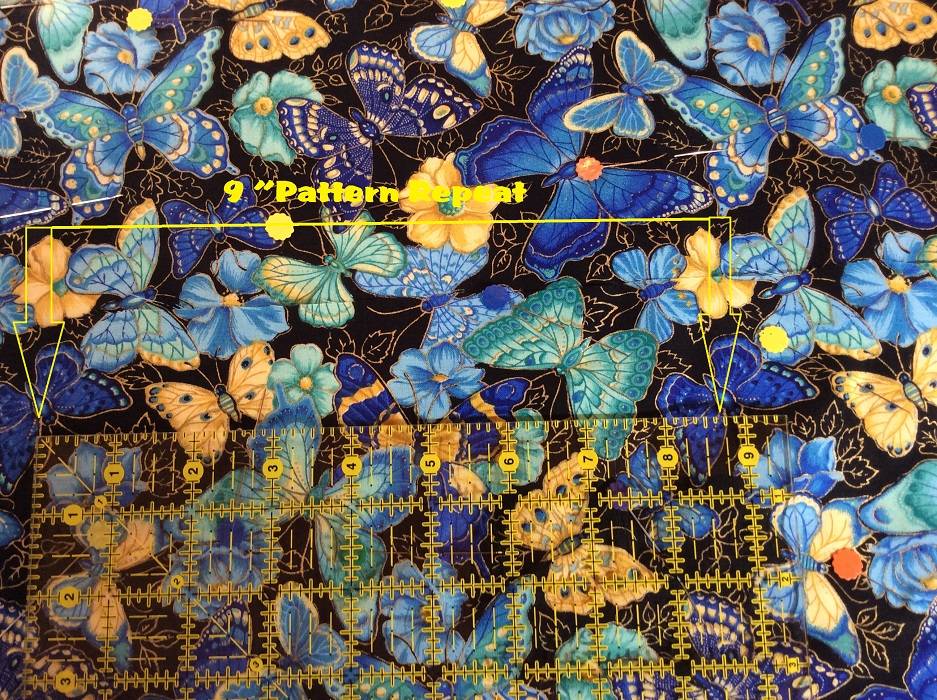
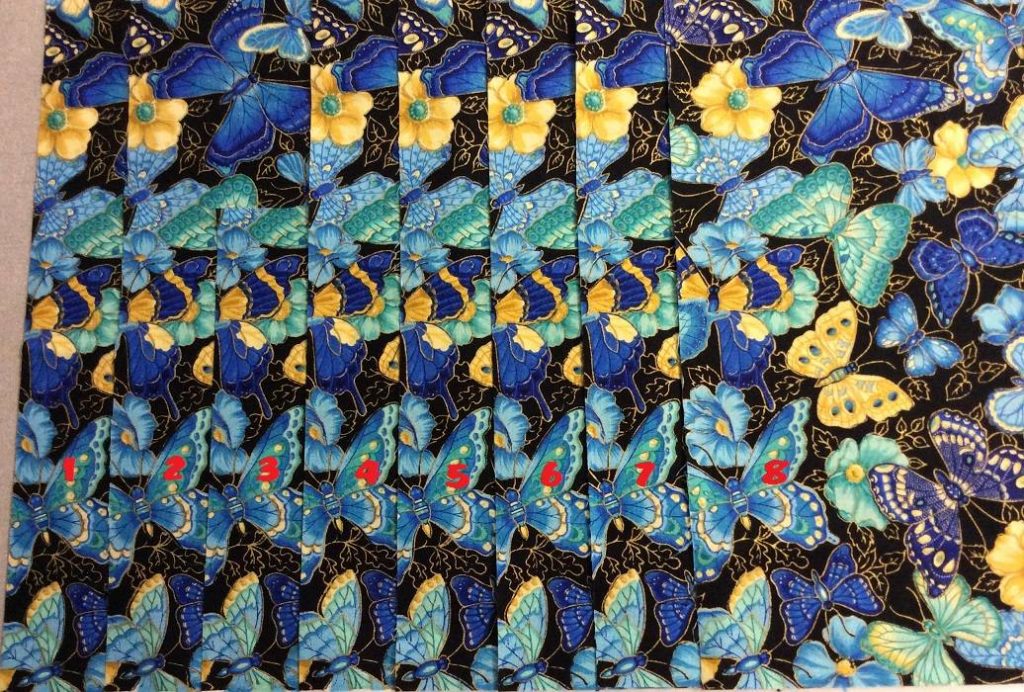
Typical pattern repeats are 12” or 24”. The repeats can be as small as 6” or can be larger than 27”. To determine the repeat, look along the selvage of your fabric until you see the same motif. Choose a point in these identical motifs and measure between these points. This will give you the pattern repeat of the fabric.
You want to cut your identical rectangles using the repeats along the length of the fabric instead of the width of the fabric. Length of the fabric repeats tend to be more accurate.
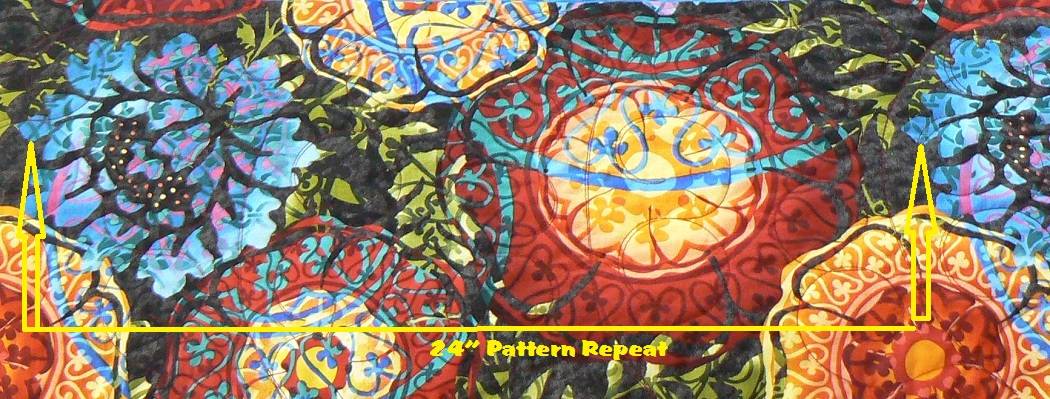
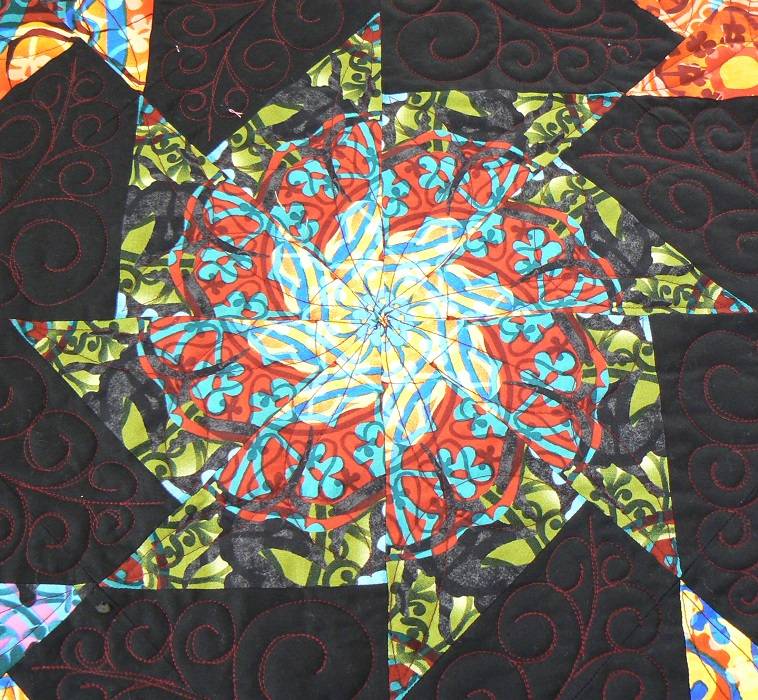
The fabric I used for my samples has a 9” repeat – see Figure 1-1.Because it is a smaller repeat, I made smaller sample blocks so they would create more interesting kaleidoscope effects. I’m also including images of a quilt I made using a 24” repeat to show the variety one gets with a larger scale, larger repeat main fabric – see Figure 1-2.
Large floral/leaf prints are a natural choice when making these quilts, but large abstract prints can create very interesting blocks also. I like prints with brighter colors with a variety of colors and shapes and good contrast as I feel those fabrics create invigorating quilts. If you want a softer look to your quilt, you will want to choose a print with softer colors and less contrast. With novelty prints, you can selectively cut your pieces to get specific motifs to form your kaleidoscope.
To get an idea of what a kaleidoscope block might look like for a particular print, you can use an angled mirror. Place the mirror on the fabric at an angle – approximately at 90°, 60°, or 45° depending on which pattern you plan to follow. When looking into the mirror, you will be able to see the kaleidoscope effect each print will produce.
Selecting the Background Fabric
The background fabric should compliment your main fabric. Usually, you’ll want to select a color for your background fabric that will bring out a color in your main fabric you want to accent. You’ll want to choose a fabric that doesn’t have too much pattern so it doesn’t take away from your kaleidoscope blocks. Many times a plain black or tone on tone black fabric will really make your kaleidoscope blocks pop. Just keep in mind the focus of your quilt is the kaleidoscope blocks so that is what you want to stand out.
How many identical rectangular pieces of fabric you’ll need to layer is determined by which pattern you choose to make. Typically you’ll need 4, 6, or 8 identical pieces. Some of my favorite Stack & Whack patterns come from two of Bethany S. Reynolds pattern books – Stack-n-Whackier Quilts and Magic Stack-n-Whack Quilts.

The most interesting four piece kaleidoscope blocks are made with novelty prints. You can selectively cut your pieces to create very cute kaleidoscope blocks to get animals or other motifs chasing each other around in a circle. You may need to purchasing more of your novelty print as when you selectively cut your pieces you tend to have more wasted fabric.
Six and eight piece kaleidoscope blocks give you more of a kaleidoscope feel and look. You can selectively cut these pieces but you will get very interesting and different kaleidoscope blocks by just cutting your pieces and letting it all happen by chance. I’ve made 4, 6, and 8 piece kaleidoscope blocks and personally I prefer the look of the 6 and 8 piece kaleidoscope blocks.
Creating Your Stack
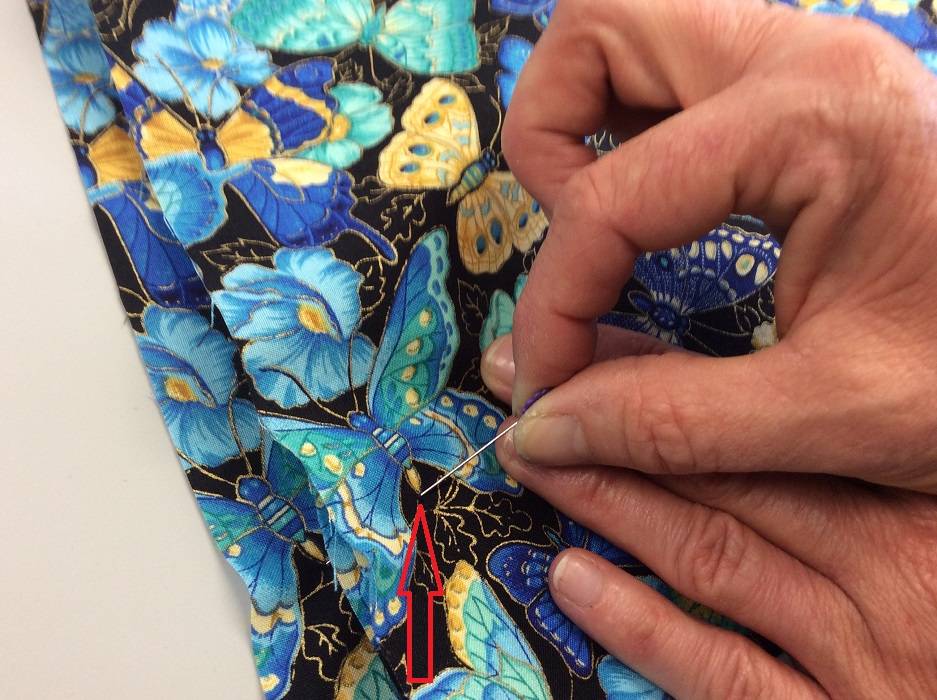
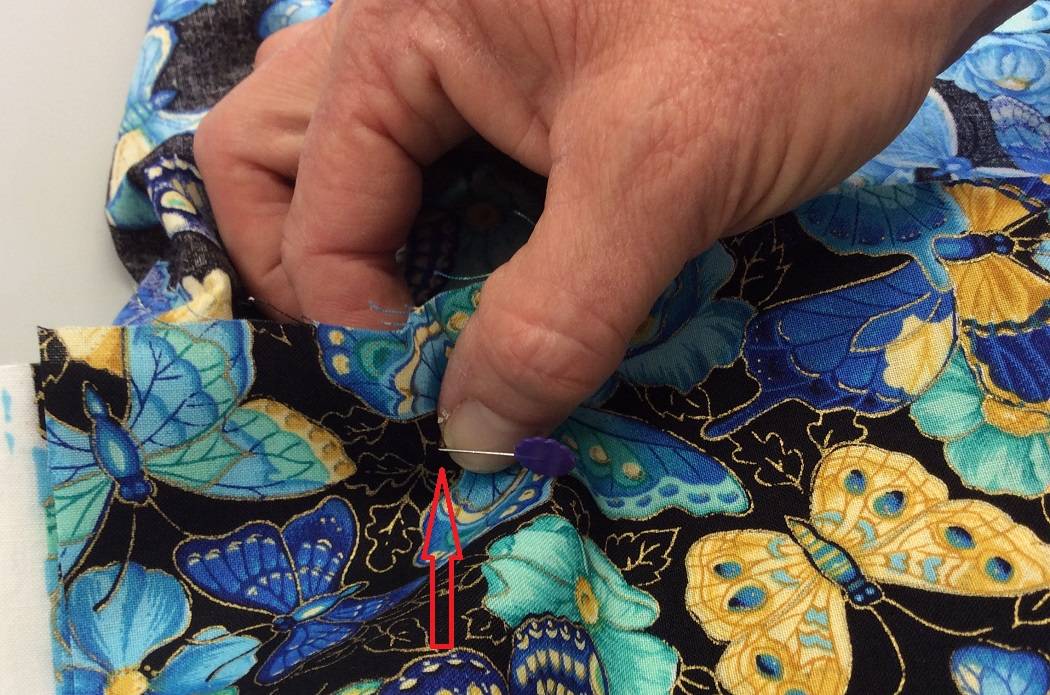
To create your stack, layer the identical rectangular pieces of main fabric on top of each other. Pick a point on the main fabric – one that is easy to identify on all your layers like a point of a leaf or intersection of 2 lines – see Figure 2-1. Being right handed, I like to start in the upper right hand corner of the rectangle. Using a flower head pin, push the tip of the pin through that point and through that same point on all you rectangle layers as shown in Figure 2-2. Lift all the layers up with the pin through those points on the fabric and pinch all the layers together next to the pin – see Figure 2-3.
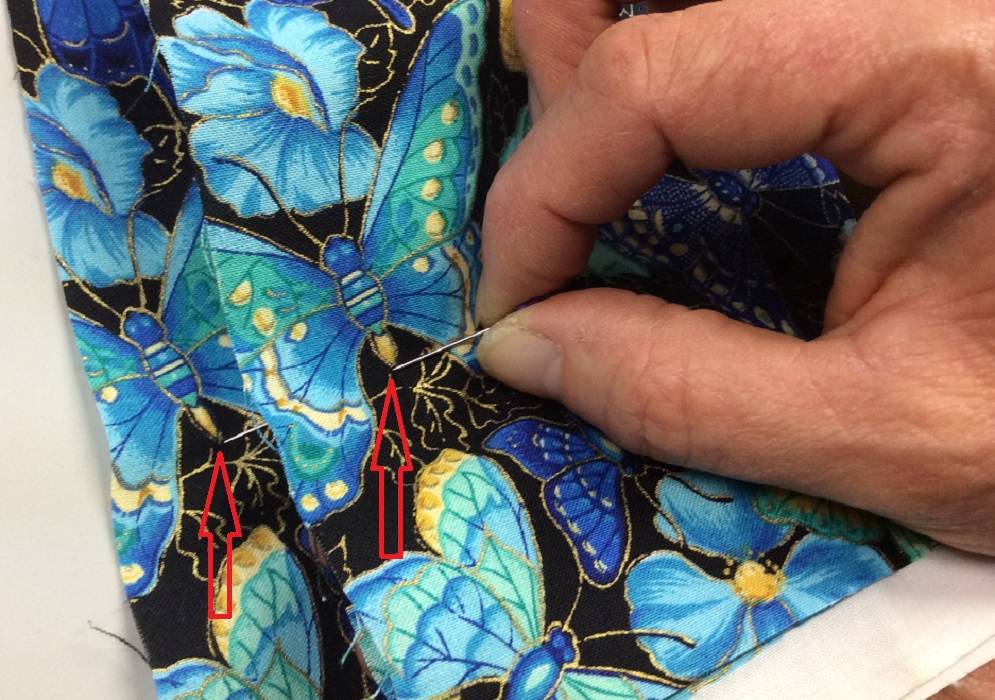
Pick another point on the main fabric about 4” to the left of the first point and follow the same process of inserting the pin through the same point in all the layers again. Lift up your layers again pinching all the layers together next to both pin as before and give all you rectangle layers a shake to relatively line them up.
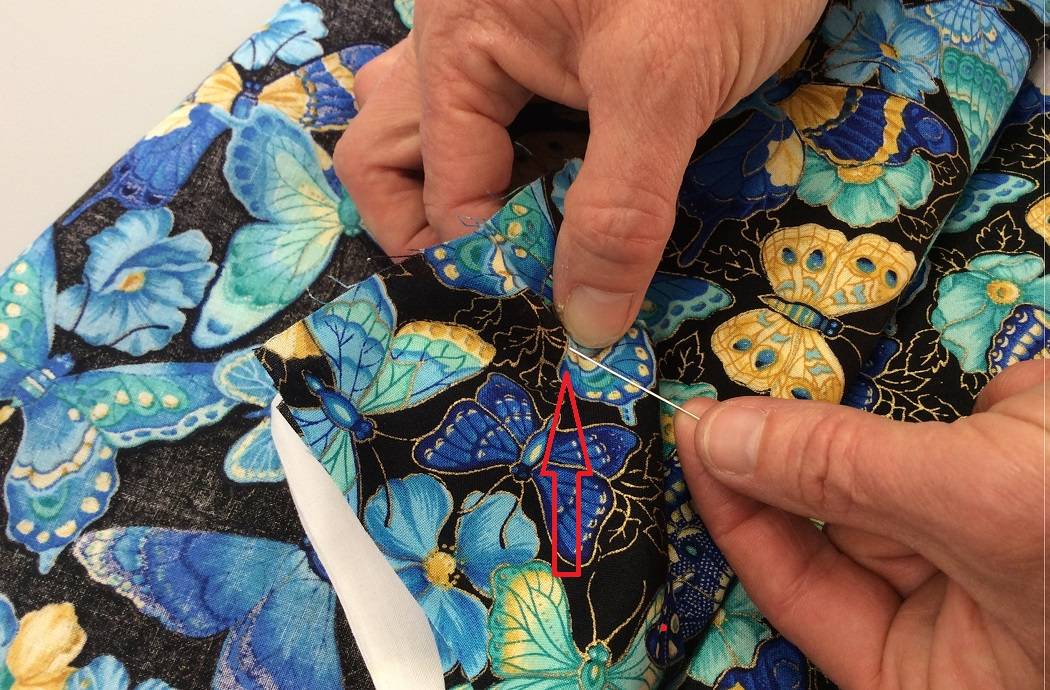
Once the layers are relatively lined up, while pinching the layers together next to each pin as shown in Figure 2-4 , remove each pin and slide the pin back through all the layers at an angle as shown in Figure making sure you pinch the layers firmly so they don’t shift. Continue the process of selecting points about 4” apart, inserting a flower pin through all the layers at that point, pinching the layers next to each pin, and then sliding each pin back through all layers while pinching the fabric firmly.
Now that you have all the layers lined up and pinned you’re ready to cut the fabric to create the kaleidoscope blocks.
4 Layer Kaleidoscope Blocks
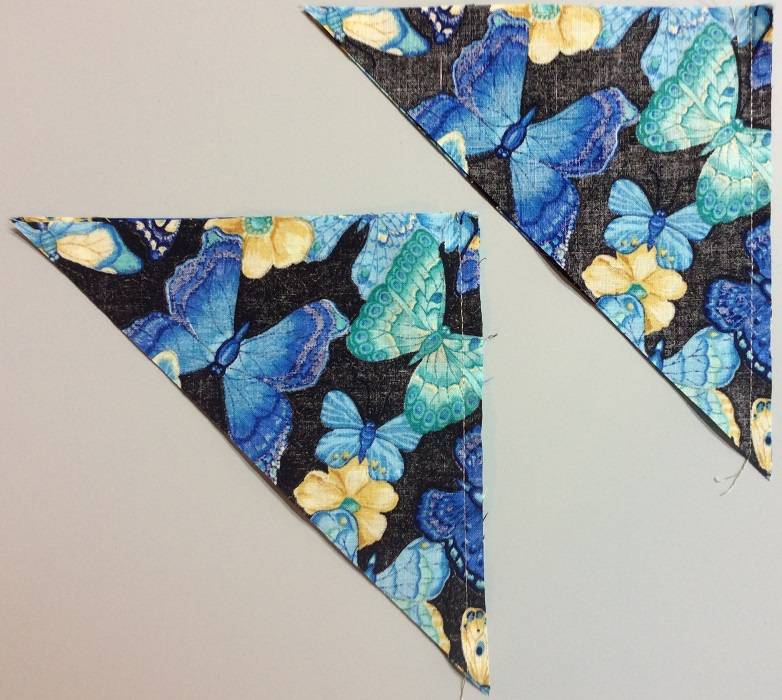
The easiest kaleidoscope block to create is a pattern with 4 layers. Cut strips across the Stack and then sub-cut that strip into squares. For example, cut a 4” strip across the Stack then sub-cut that strip into 4” Stacked squares. At this point you have 2 choices – you can cut each Stacked square once on the diagonal creating 2 triangle Stacks or you can cut the Stacked squares on both diagonals creating 4 triangle Stacks.
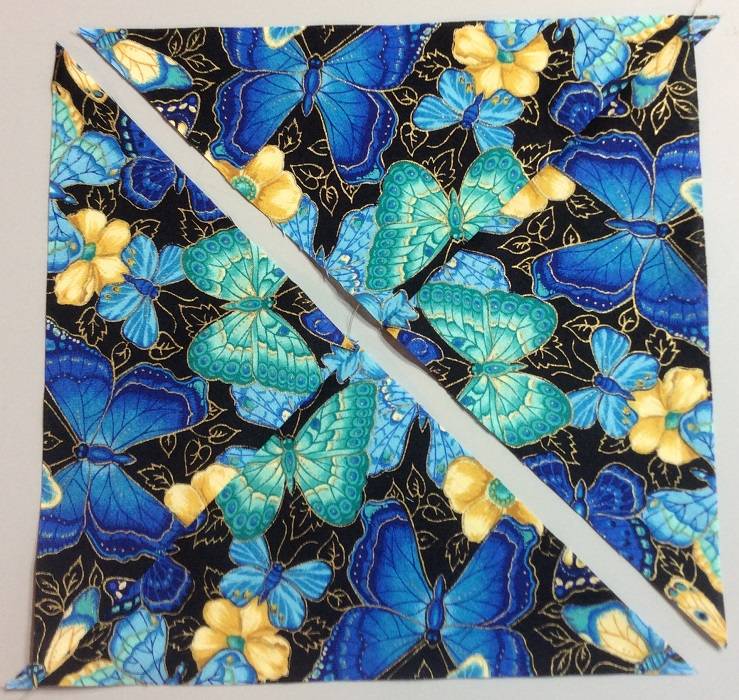
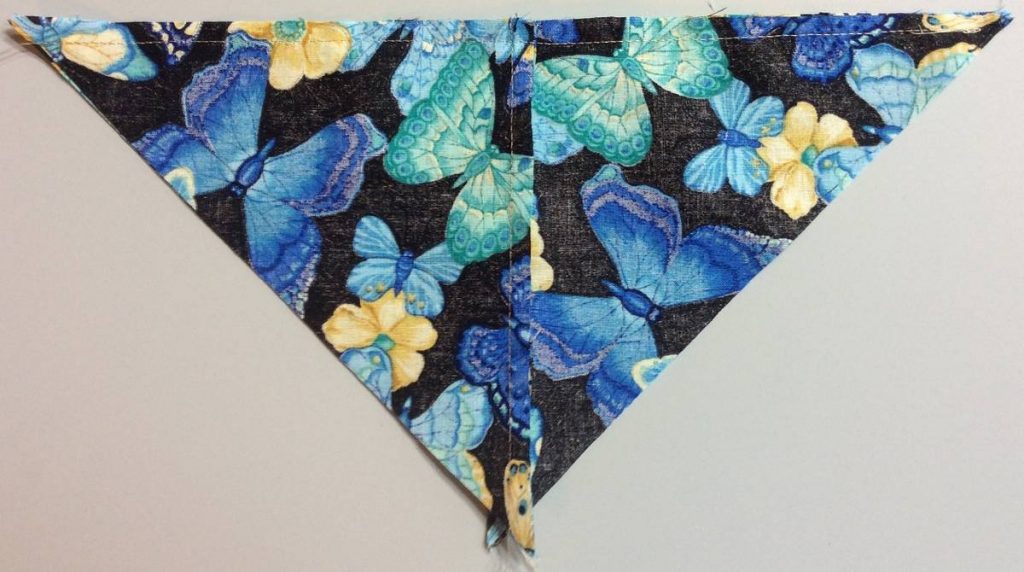
Take a Stack of triangles and organize the pieces so all the 90° angle of the triangles point towards the center. The motifs in all the pieces of this Stack should be nearly identical so when you place the pieces in this manner it will create the kaleidoscope look. Sew together 2 triangles from the Stack, right sides together – see Figure 3-1, along one of the short sides as shown in Figure 3-2. Repeat with the other 2 triangles from this Stack. Press the seams in opposite directions. Sew together these two pieced triangles – see Figure 3-3, matching the seams at the center, to make a square as shown in Figures 3-4 . Press this seam to one side. Repeat this process for all the triangle Stacks.

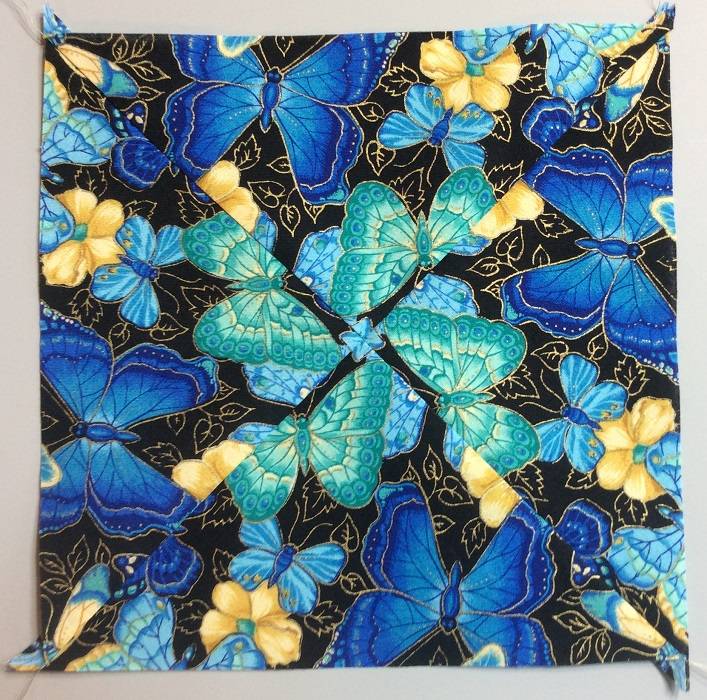
Once you have all the 4 layer kaleidoscope blocks created, you can finish them into a quilt top several different ways to create different looks. The biggest difference between cutting once on the diagonal or both diagonals is cutting once on the diagonal the outside of the kaleidoscope block will be on the bias of the main fabric. If you cut both diagonals, the outside of the kaleidoscope block will on the grain of the main fabric.
8 Layer Kaleidoscope Blocks
Eight layers create some of the more interesting and desirable kaleidoscope blocks. Starting with the eight identical rectangular Stacked layers, cut strips across the Stack. Now sub-cut those Stacked strips into Stacked squares – for example cut 6¼” Stacked strips then sub-cut into 6¼” Stacked squares. Cut the Stacked squares once on the diagonal creating 2 triangle Stacks.
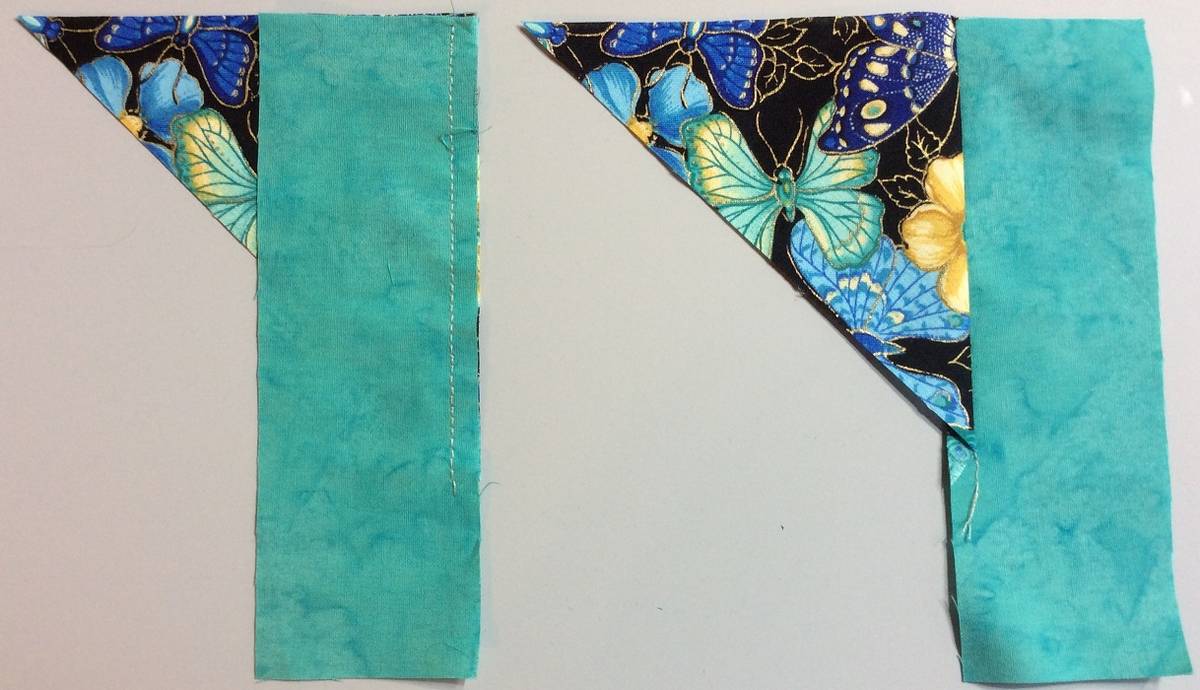
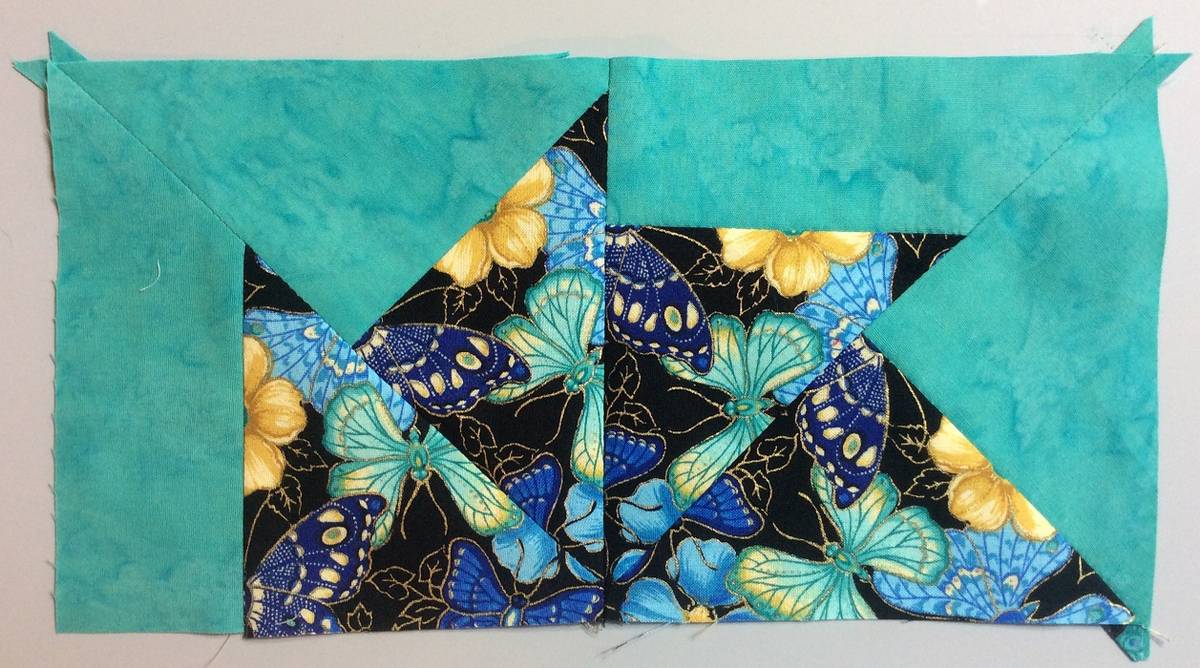
Take one of the triangle Stacks and arrange the triangles with one of the 45° angles pointing towards the center creating a pinwheel and the kaleidoscope look. Cut squares of your background fabric the same size as your main fabric Stacked squares and cut them once on the diagonal. Sew them to half the Stacked triangles and press to the main fabric as shown in Figure 4-1. Cut rectangles according to the pattern chart and sew them to the other half of Stacked triangles and press to the main fabric as shown in Figure 4-2.

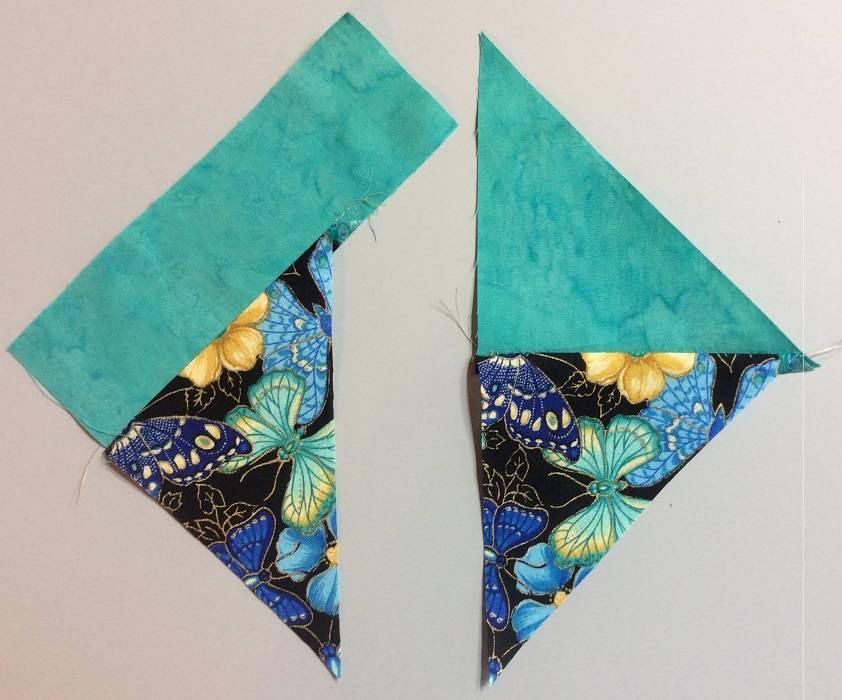
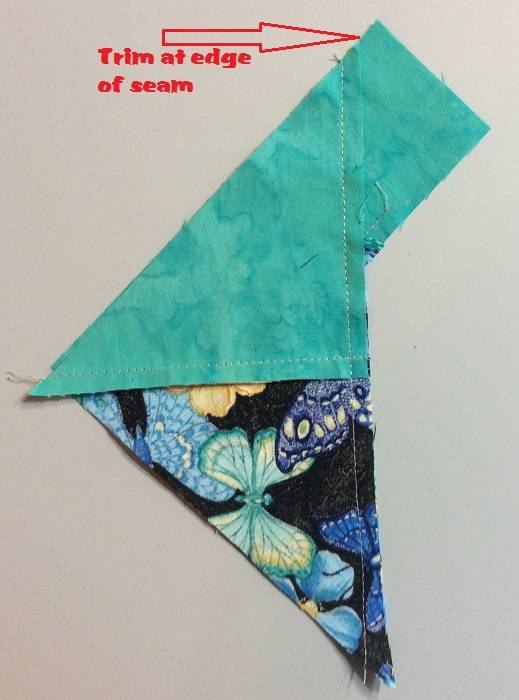
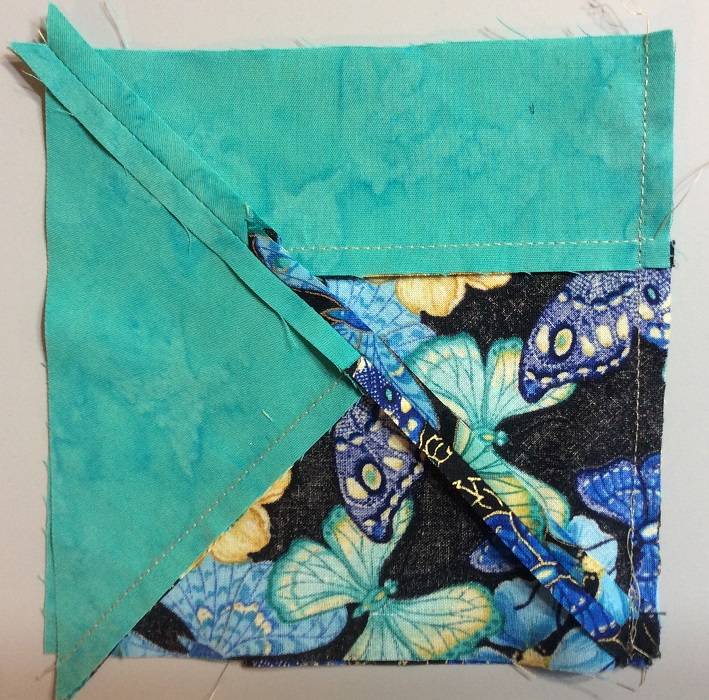
Lay out the triangle/rectangular and the triangle/triangle units as shown in Figure 4-3. Flip the triangle/triangle unit on top of the triangle/rectangular unit – right sides together and sew and trim as shown in Figure 4-4. Press this seam open. You should now have 4 squares as shown in Figure 4-5. Sew 2 of these units together, see Figure 4-6, and press the seam open to create half the pinwheel kaleidoscope block as shown in Figure 4-7. Repeat for the other 2 units. Sew these two half pinwheel kaleidoscope blocks together and press the seam open to create the pinwheel block.

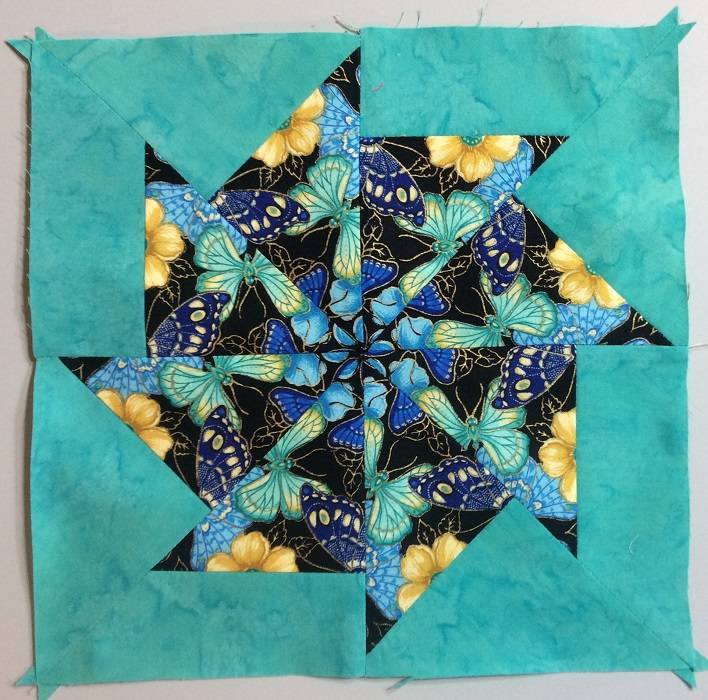
Once all you pinwheel kaleidoscope blocks have been created, arrange them to create the quilt top desired. I like to use the main fabric as an outside border of the quilt top. This way you can see what fabric you started with to create all the very different kaleidoscope blocks.
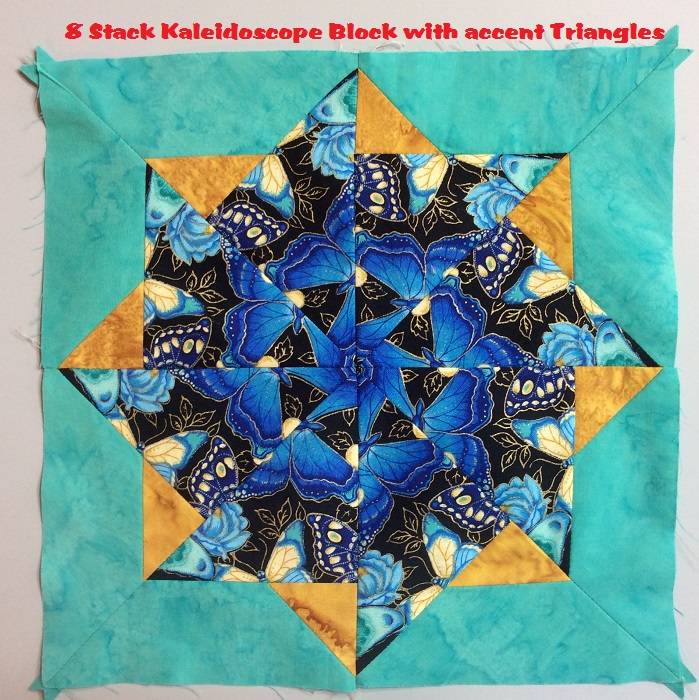
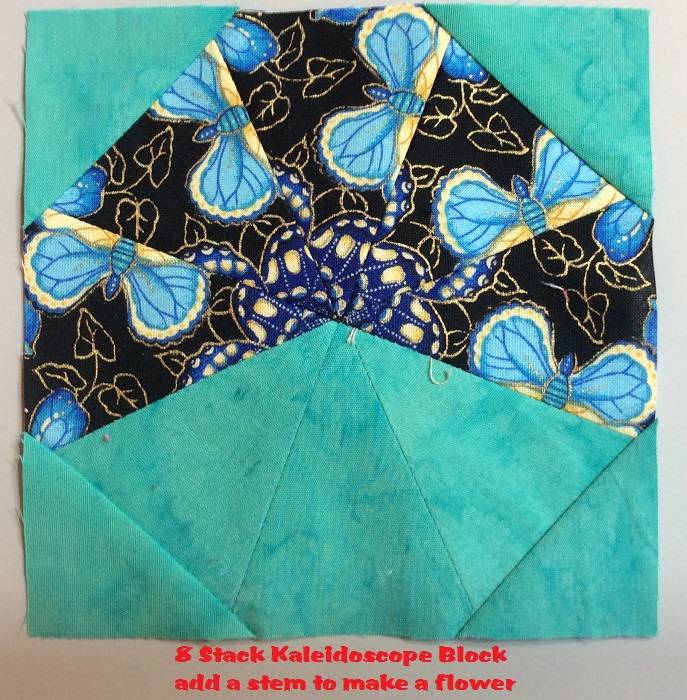
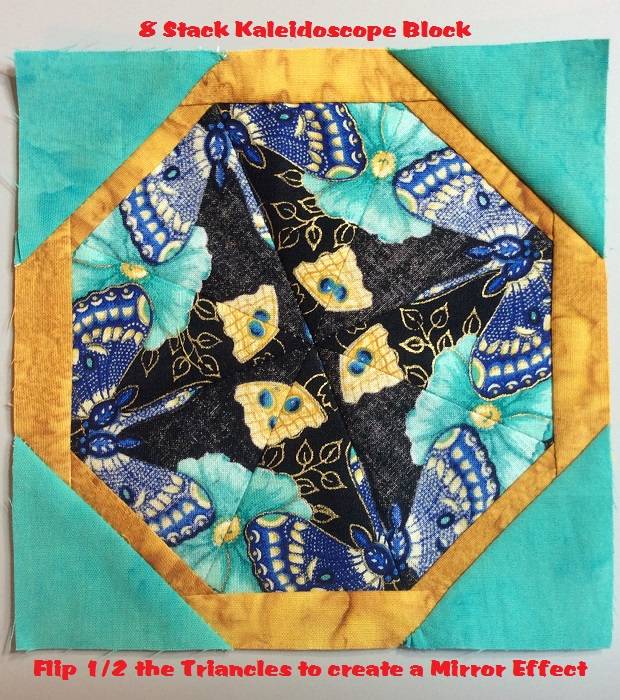
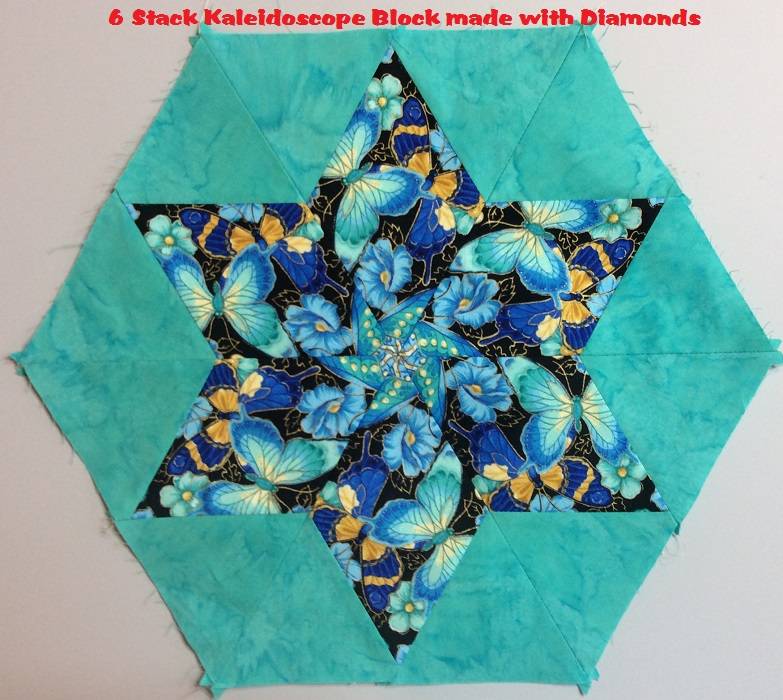
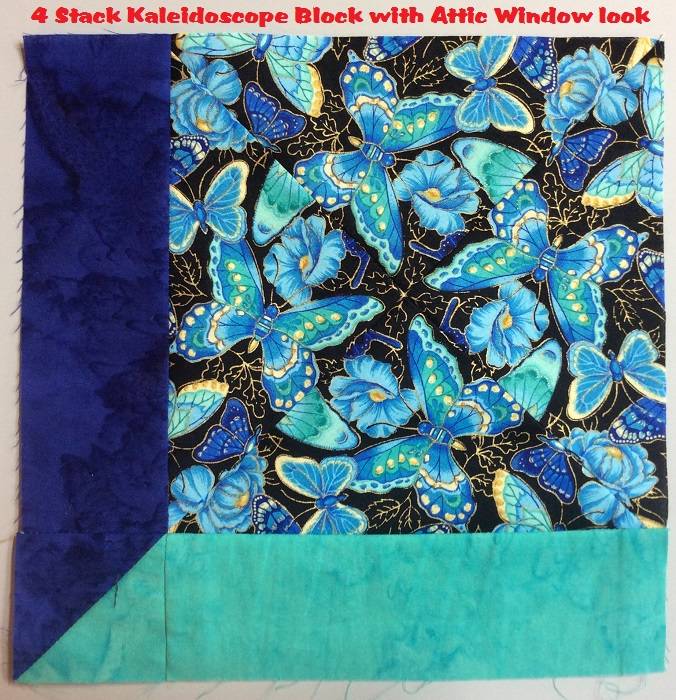
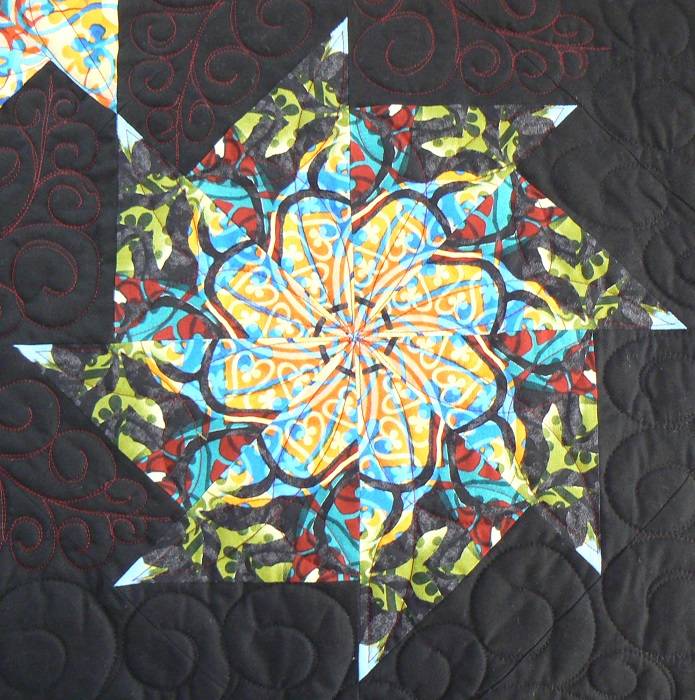
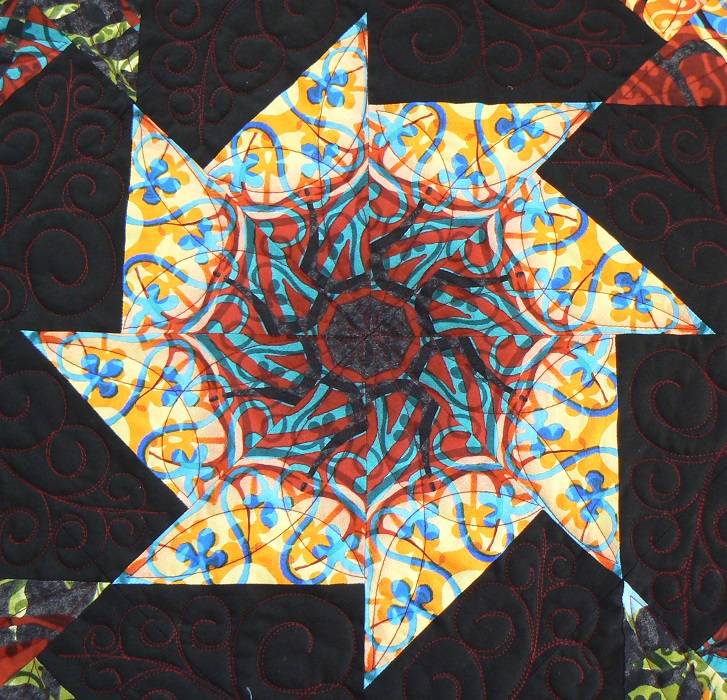
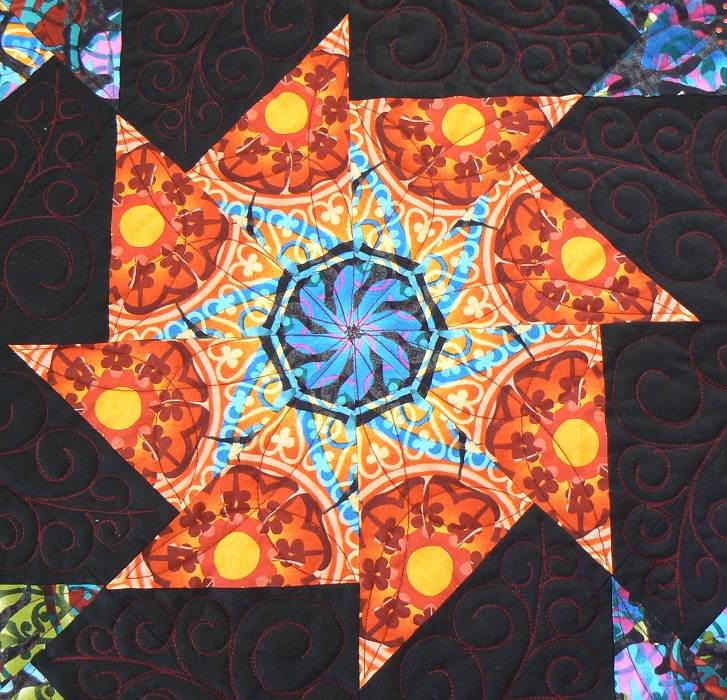
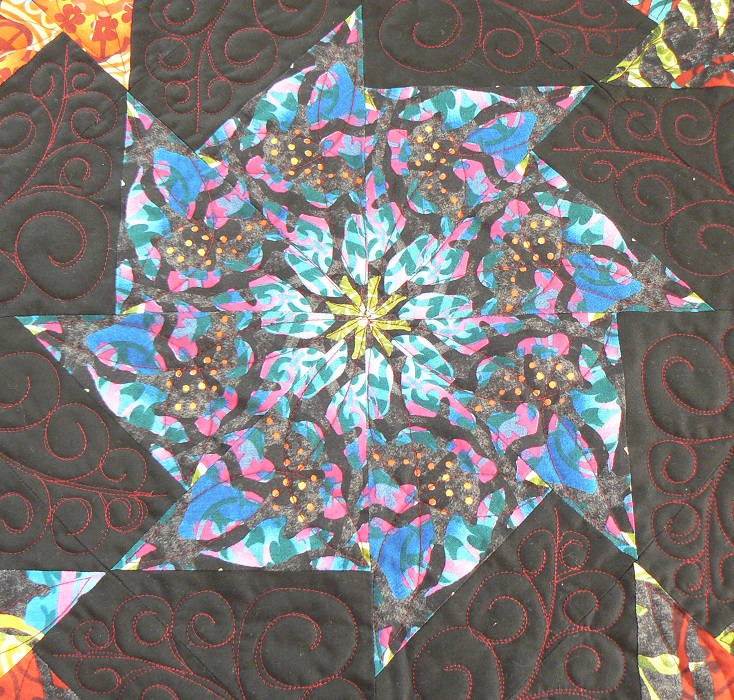
These are just two examples of kaleidoscope blocks. Bethany Reynolds Stack-n-Whack pattern books will give you plenty of ideas on different quilt tops that can be created using the Stack & Whack method. Here are some examples of different kaleidoscope blocks that can be created using 4, 6, or 8 layers of main fabric. Here are a few more types of kaleidoscope blocks.

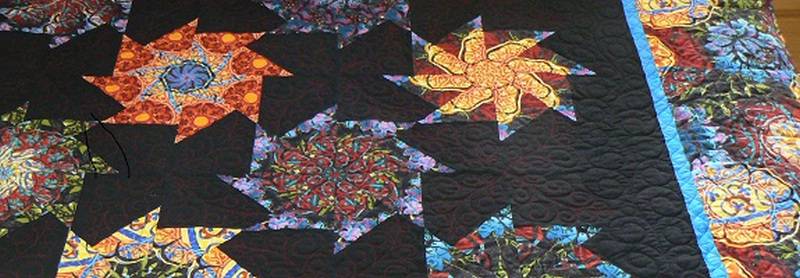
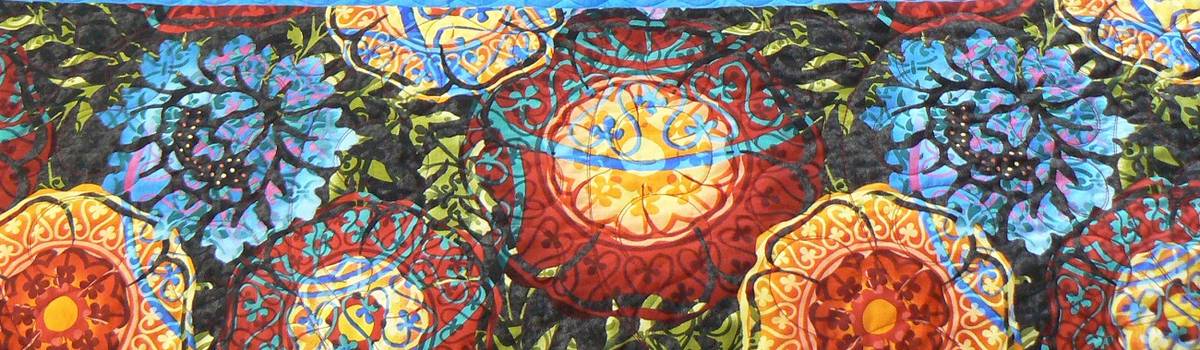
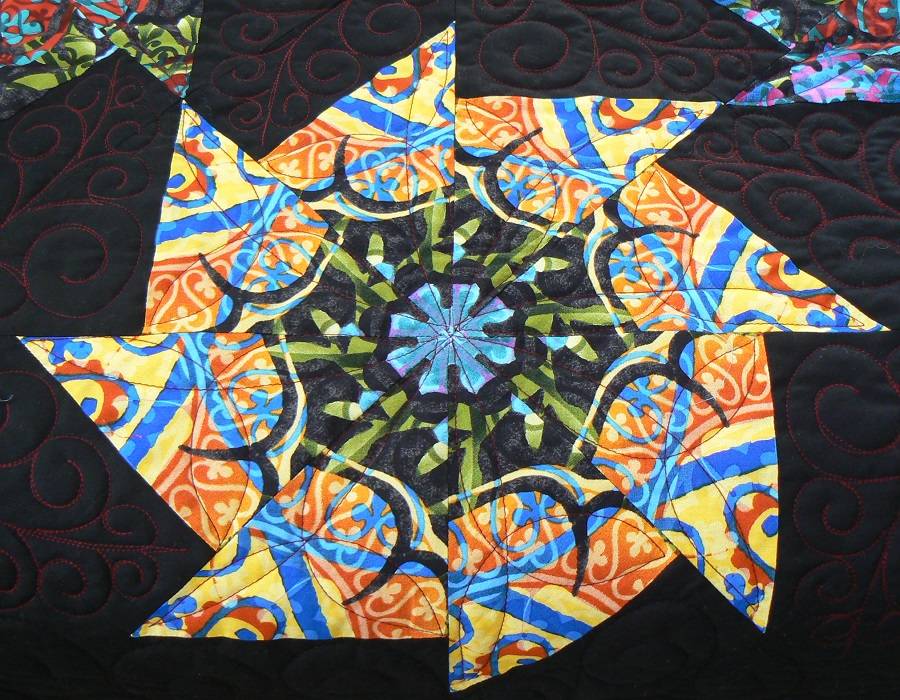
Below is another fabric with some of the kaleidoscope blocks created from it.
I hope you found this Stack & Whack Tutorial helpful or inspirational. When I make a Stack & Whack quilt, I have to lay out each block as I cut them as it’s so much fun to see how differently the kaleidoscope blocks turn out.
A class can be scheduled at Smoky Bear Creek Retreats. If you would like to join one of our retreats, I’d love to help you create one of these gorgeous stack and whack quilts. Happy Quilting!